
How to upload a session recording to Mentalyc
Upload Your Therapy Session on Mentalyc in 4 Steps
Uploading a session on Mentalyc is super easy and can be easily done in 4 easy steps.
You can upload a recording of your session via Computer or Mobile phone, the steps are more or less the same. The only difference is in the interface.
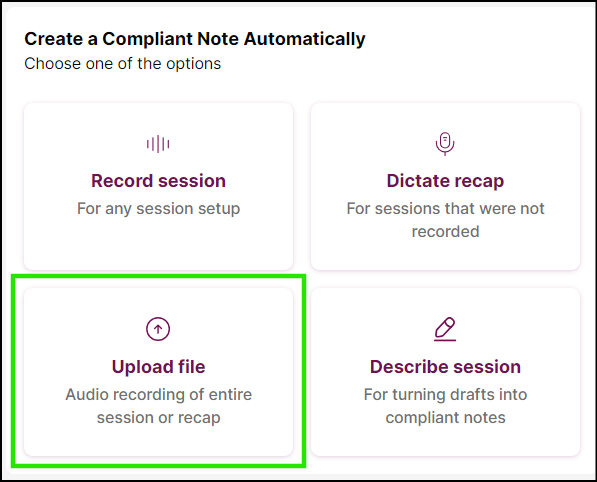
Step 1: After logging in, click on the “Upload file” tile at the bottom-left side of the card on the dashboard.
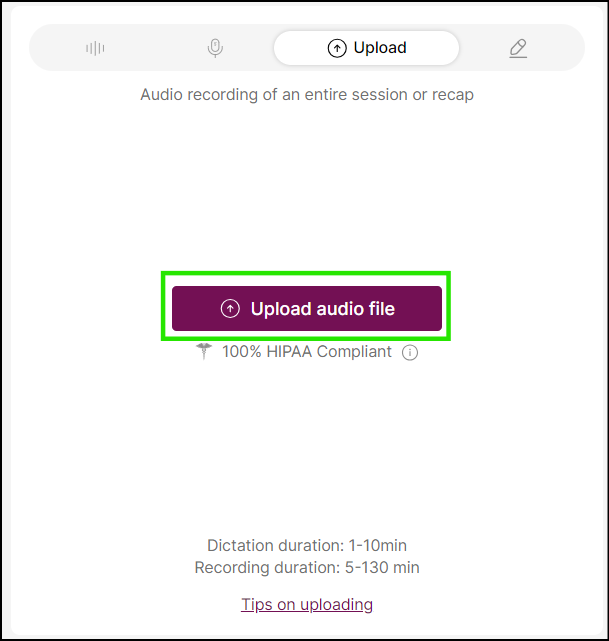
Step 2: Click on the “Upload audio file” button and select your audio file.
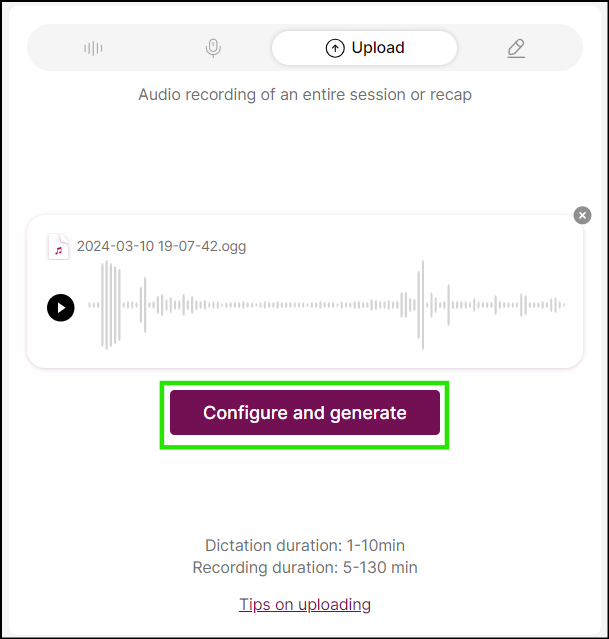
Step 3: Click on “Configure and generate”
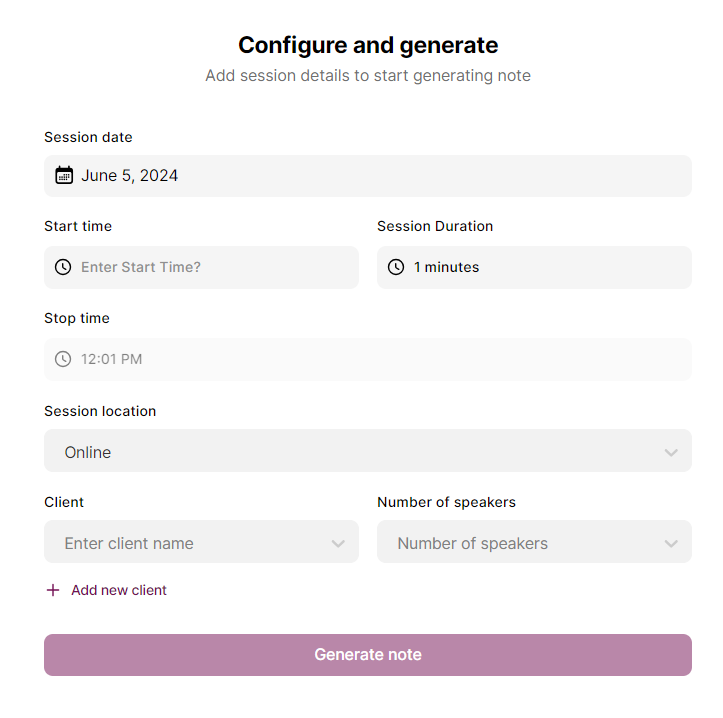
Step 4: Input the details of the particular session and click on “Generate note”
Step 5: Give it a few minutes to generate the note.

Step 6: Finally, click on “View note” to display the generated note.
